How Microsoft is Transforming Software Development with AI—One Commit at a Time
Microsoft reveals how the .NET MAUI team is leveraging GitHub Copilot as a structured collaborator, contributing real code and tests to the repo. The move signals a shift toward AI-assisted DevOps in large-scale engineering teams.
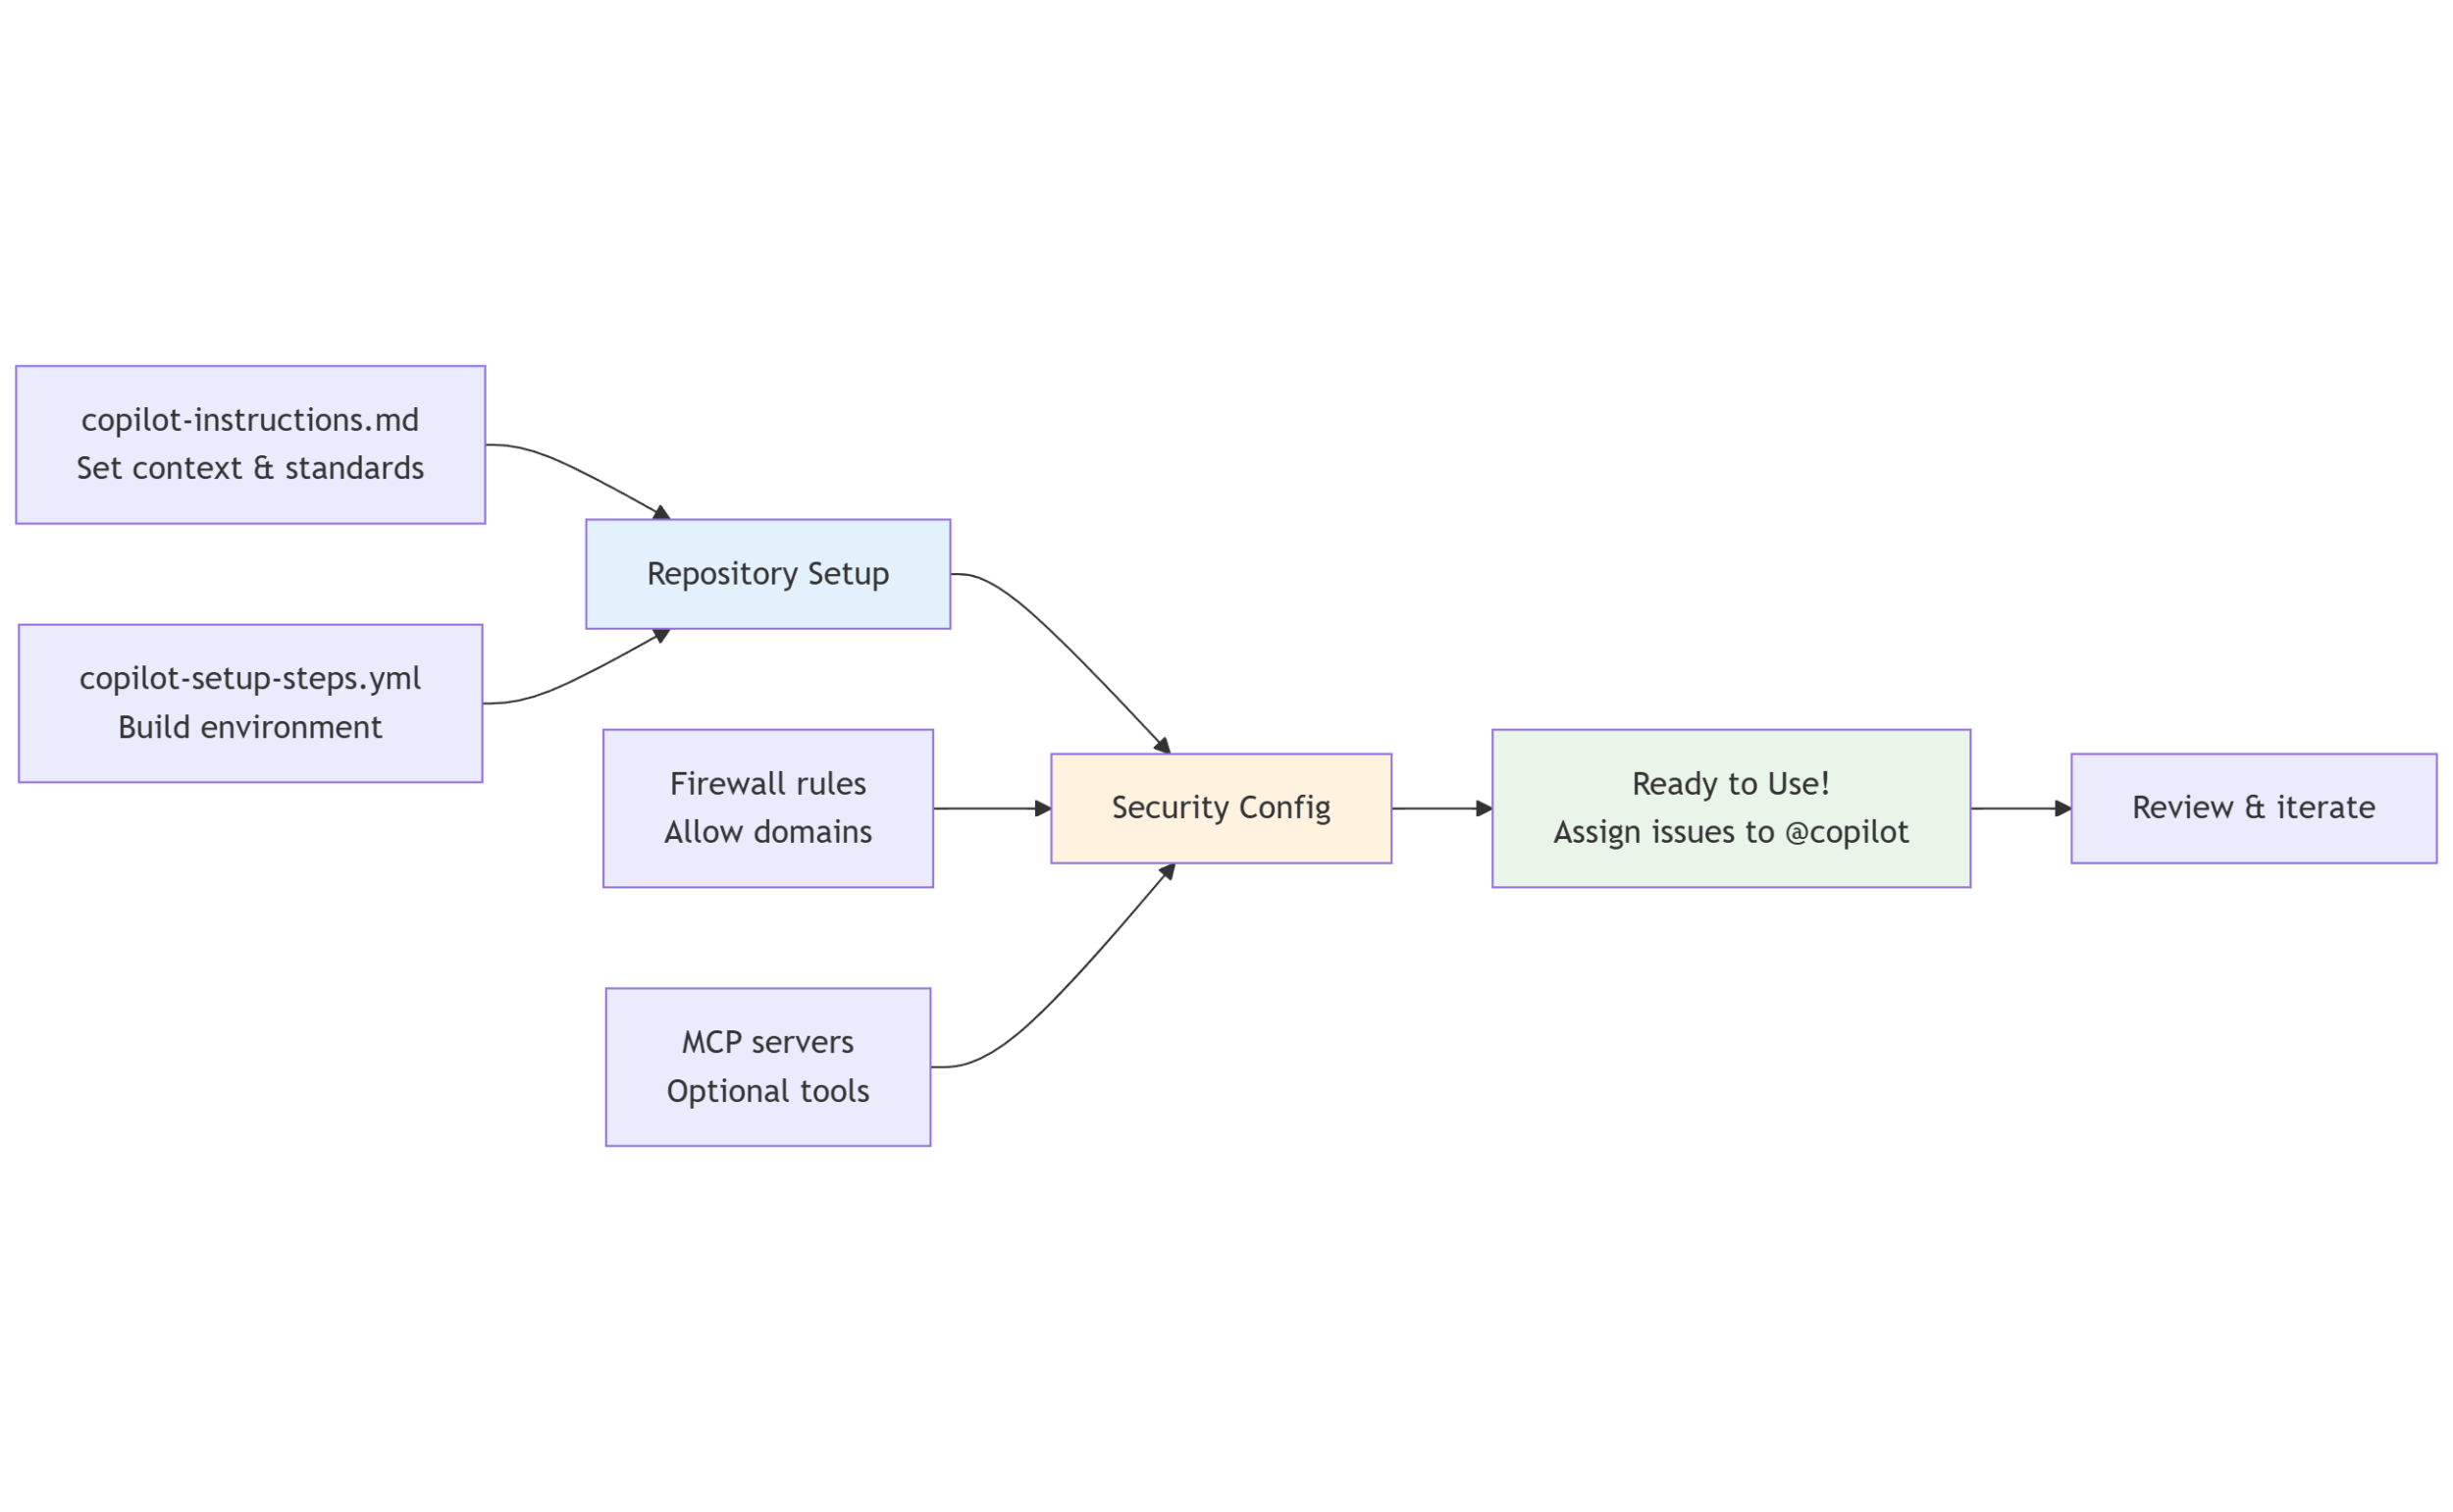
Here's a step-by-step look at how they set it up:
Step 1: Add Copilot Instructions
Start by including a copilot-instructions.md file to give GitHub Copilot essential context and guidance. Place it in the .github folder at the root of your repository to ensure Copilot understands your project’s structure and goals.
Step 2: Understand Firewall Warnings
After Copilot completes an issue, you might see a firewall warning on the pull request. This is a key security feature that helps control outbound access from the Copilot Agent.
Step 3: Allow Trusted Domains
To let Copilot make necessary web requests, go to Settings > Environment > Copilot in your GitHub repository. Scroll to the bottom to the Environment Variables section, and add a variable named copilot_agent_firewall_allow_list with a comma-separated list of trusted domains.
Step 4: Run Copilot in GitHub Actions
Copilot runs in GitHub Actions, giving you full control over how and where it operates. You can also let Copilot auto-generate a copilot-setup.yml by filing an issue.
Step 5: (Optional) Use MCP Servers
Set up Model Context Protocol (MCP) servers to enhance Copilot’s capabilities with specialized tools and domain context. Configure this under Settings > Copilot > Coding Agent > MCP Configuration.
